Homemade Pan Seared Rib-Eye Steak


Printable Recipe (click to expand)
Ingredients
Method
- Season steak with a generous amount of salt then place in fridge uncovered overnight.
- Take steak out of the fridge and let sit at room temperature 1 hour before cooking.
- Preheat a 10-12 inch cast iron skillet on medium-high heat for 5-10 minutes; once preheated coat the pan will a little bit of olive oil.
- Generously season steak with freshly ground black pepper and place steak in the middle of the skillet and cook for 30 seconds without moving, then gently turn the steak and cook for about 2 minutes.
- Flip the steak and cook for another 2 minutes, continuing to flip every 2 minutes until steak reaches desired doneness.
Notes
Medium Rare 125-135ºF
Medium 140ºF
Medium-Well 140ºF
Well-Done 160ºF * please note that these are not USDA temperatures which are more conservative due to food safety but most professional chefs cook to these temperatures.
Hey there Honey's and New-Bees!
This week my romeo surprised me with the LeCreuset cast iron skillet that I’ve been eyeing for the last couple of months 😍. Ever since I bought my dutch oven last year I’ve been wanting a good cast iron frying pan but wanted to wait since I knew the one I wanted wasn’t cheap and I wanted to make sure I knew how to properly take care of cast iron before making the investment.
This pan is absolutely stunning, so much so that I didn’t even want to cook with it the first couple of days, but I know that would be ridiculous and be such a waste to just let it sit on my countertop collecting dust. So while I was admiring this beautiful smokey grey skillet I brainstormed what my first meal with it would be and decided to make the dish that made me want to get this pan in the first place- Pan Seared Rib-Eye Steak.
If you’ve never had a pan-seared ribeye then you’re in for a real treat! For many of us (myself included) when we think of steak we think of BBQ , so when I pulled out 2 steaks for dinner last fall and realized I had no propane left in my BBQ I was pretty disappointed and decided to settle on just frying them instead…. Well, those steaks turned out to be the BEST steaks I’d ever made or eaten, and now I’ll have to settle of BBQ steak on those days it’s to hot to cook indoors lol!
Not only is pan searing incredible delicious, it’s ridiculously easy, so get your cast iron pans out and happy searing!
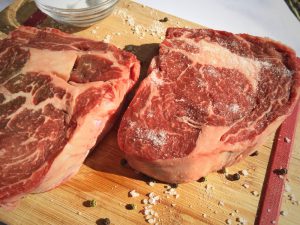
Step 1 –Temper and Season
Before you start anything take your steaks out of the fridge, generously season them with salt, then let them sit at room temperature for at least an hour before you cook them.
There are a couple of reasons why you want to salt your meat and keep it out of the fridge well before you cook them all of which I’ll break down for you 😀.
 Firstly, allowing your meat to reach room temperature before cooking it will enable your steak to cook evenly. If your steak is cold when you start cooking it, the outside will still sear and cook quickly, but it will take the interior a lot longer to cook since it’s still cold. Although you want to sear the exterior of your steak you don’t want to it to burn. If the center of your steak is still cold when you start cooking, you’ll have to cook your steak for a longer amount of time and the exterior will start to burn and become tough, or you won’t cook it long enough for the center heat up and end up with with a beautifully seared exterior with a raw and cold interior (I actually got served steak like this at a restaurant once). So all that being said let your meat reach room temperature before cooking so that it cooks more evenly!
Secondly, you want to salt your meat AT LEAST 1 HOUR BEFORE cooking it. When you salt your steak you’ll notice that the salt dissolves within a couple of minutes and will begin to draw liquid out of the meat and onto its surface. Given enough time that liquid will dissolve into the meat and break down the muscle structure which enables the meat to reabsorb the it’s own juices. The longer you let the salt work its magic the deeper it penetrates into the muscle structure which will help tenderize and flavor the meat!
At a minimum, it takes at least an hour for all this to occur and if you have the time I would recommend seasoning overnight for the best flavor! But whatever you do don’t rush this step and wait at least 1 hour before cooking, if you do rush the salting, the liquids won’t have a chance to reabsorbs, and your steak will not only be tough but won’t sear properly since the liquid that was drawn out of the meat will drop the temperature of your pan and prevent your steak “crust” from forming.
 Thirdly, that crust (I really hate using that word) is caused by what is known as the Maillard reaction, which is a chemical reaction that occurs when the sugars and amino acids in the meat react with the heat to create an incredible flavor, but also help prevent the exterior of your steak from burning while the inside cooks (provided you tempered the meat first).
To achieve the Maillard reaction you need to make sure your meat is dry when you sear it!! There are many recipes out there that suggest salting your steak uncovered iovernight n the fridge, and for the longest time I ignored the advice and I would just salt my steaks ahead of time, cover it in the fridge, then pat them down with a paper towel right before cooking and it my steak was still tasty; but, once I finally left the steaks uncovered in the fridge overnight I realized how much I’d been cheating myself.
Leaving the steaks uncovered made a HUGE of the difference, not only did steaks sear beautifully but the flavor was INCREDIBLE! So do yourself a big favor and keep those steaks uncovered in the fridge!
Ok so now that you got all that let’s move on to step 2!
Step 2 – Preheat your Pan
Preheat your cast iron frying on medium heat for 10 -15 minutes, without anything in it. It’s really important that your pan is very hot when you add your meat so that it’ll sear, so you really want to make sure it scorching hot when you add your meat. Searing your meat will caramelize the sugar and proteins on the surface of the meat and create that beautiful crust we talked about earlier, if your pan isn’t hot enough your steak(s) will still be edible but it won’t sear and you won’t get that beautiful color and crispy exterior that add so much flavor to your meat. So be patient and let your pan warm up because that little bit of extra time will go a long way 😄.
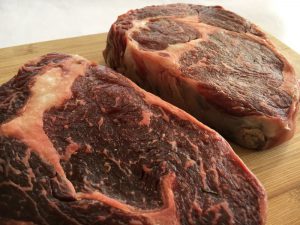
Step 3 – Sear your Steaks
While your pan is warming up, gently pat down your steak (if needs be) with a paper towel to wipe up any excess moisture form the meat (you won’t need to do this if you left the steaks uncovered) and season them with a generous amount of freshly ground pepper.
Once your pan is preheated, add a tablespoon of butter, let it melt then add your steak(s). Let the steak(s) sear for about 2 minutes without moving them to allow that beautiful crust to form, then flip them over and do the same thing on the other side.
Once the initial crust has formed continue to cook your steaks flipping every 2 minutes until they reach your desired doneness which you can tell by checking the temperature with a thermometer (please see doneness chart inn recipe box), then remove the steak(s) from heat and let them sit about 5 minutes before cutting!
Voila, that’s it! Hope you enjoyed this post and please let me know in the comments how your steaks turned out!

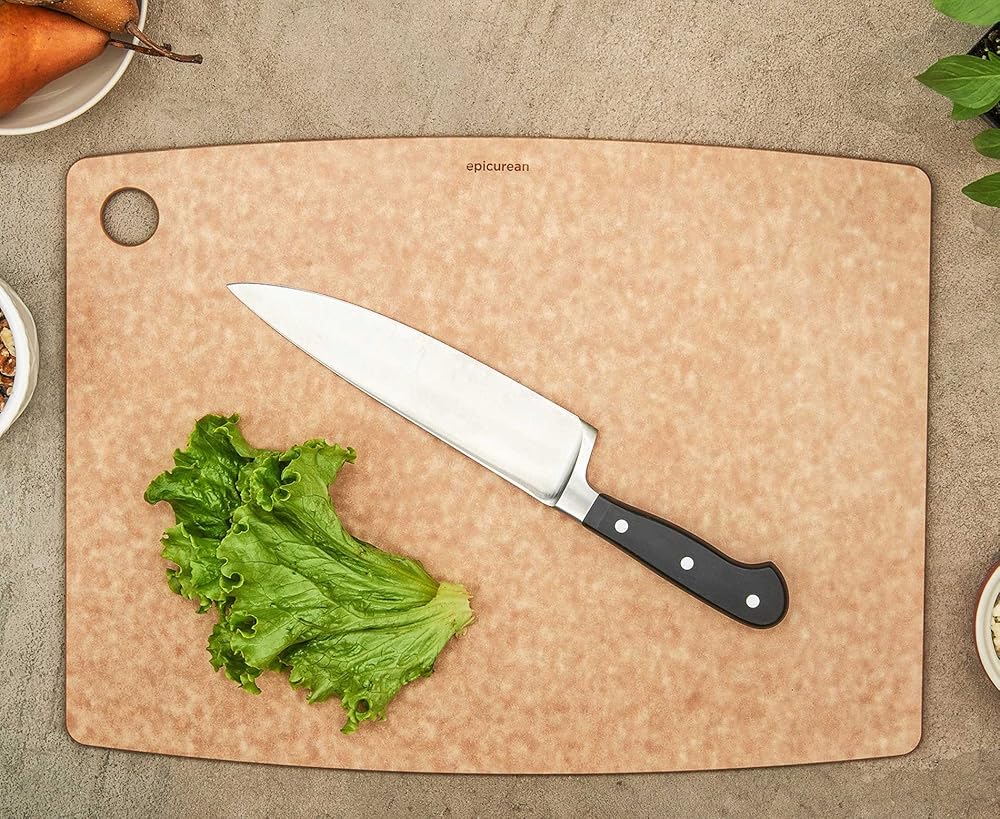
Items Featured in this Post:


Ingredients
Method
- Season steak with a generous amount of salt then place in fridge uncovered overnight.
- Take steak out of the fridge and let sit at room temperature 1 hour before cooking.
- Preheat a 10-12 inch cast iron skillet on medium-high heat for 5-10 minutes; once preheated coat the pan will a little bit of olive oil.
- Generously season steak with freshly ground black pepper and place steak in the middle of the skillet and cook for 30 seconds without moving, then gently turn the steak and cook for about 2 minutes.
- Flip the steak and cook for another 2 minutes, continuing to flip every 2 minutes until steak reaches desired doneness.
Notes
Medium Rare 125-135ºF
Medium 140ºF
Medium-Well 140ºF
Well-Done 160ºF * please note that these are not USDA temperatures which are more conservative due to food safety but most professional chefs cook to these temperatures.
"If
-
 Homemade Caesar Salad
 Simple Caesar salad dressing you can whip up in a flash.
 -
 Easy Roasted Potatoes
A very simple side dish that every cook should know!
Easy Roasted Potatoes
A very simple side dish that every cook should know! -
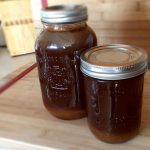 Stock Up On Stock
A fantastic way to minimize waste, maximize nutrition and increase flavour to any dish.
Stock Up On Stock
A fantastic way to minimize waste, maximize nutrition and increase flavour to any dish. -
 Homemade BBQ Chicken Thighs
The best barbecue chicken you've ever had ...and it's not even barbecued!
Homemade BBQ Chicken Thighs
The best barbecue chicken you've ever had ...and it's not even barbecued!
Check out even more delicious dishes on my Recipes Page!
Just reading this post is making me hungry! Can’t wait to try your recipe.
Thanks! Enjoy 😊
Great suggestions, I love the idea of keeping the steak uncovered. I will give it a try.
Glad you found the suggestion helpful! Enjoy your next steak!
Some brilliant advise here. Never thought of leaving it uncovered before. Will be trying it the next time! Congrats on you new pot 😊!
Thanks Sunrita! Glad you enjoyed the tips here, leaving it uncovered made such a huge difference, enjoy your next steak!
Yum, reading this is making me hungry. What great suggestions on how to cook the meat, going to try that. Thanks so much for sharing this awesome recipe.
Amazing… thanks for the info… I never could figure out why my husband did all these things too… he’d always just say it’s just what you do. Now I know why! 🙂
A well-cooked steak can be the highlight of any meal. Thanks for providing an easy and effective method to make a great steak 🙂
My pleasure, glad you enjoyed the post!
This looks delcious! Definitely trying this!
Thanks! Enjoy 😊
Enjoy!