Homemade Rice Pilaf
Printable Recipe (click to expand)
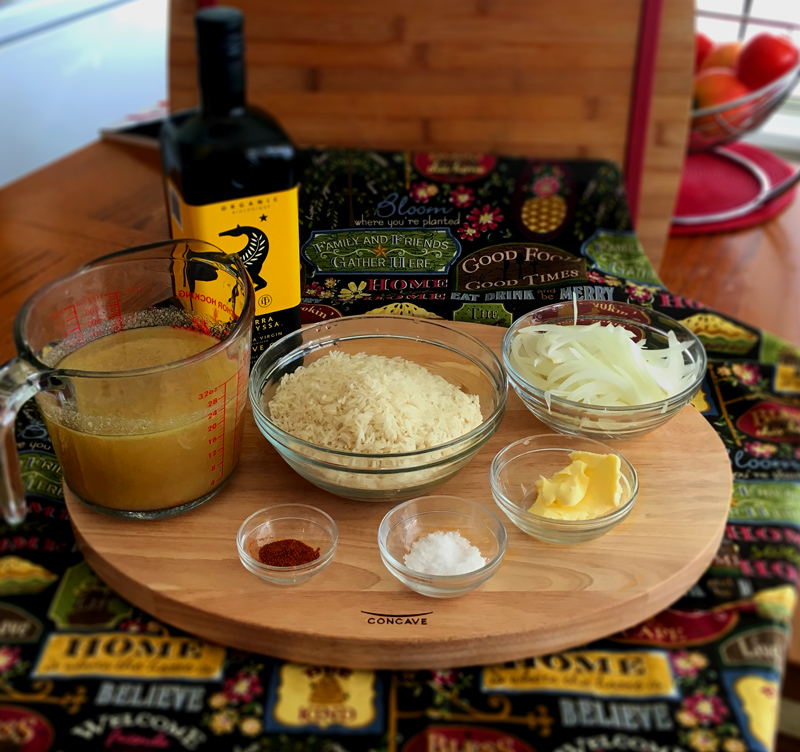
Ingredients
Method
- Pre-Heat oven in 350° F.
- Melt butter and oil in large pan on medium heat.
- Add onions and cook until browned (7-8) minutes, then transfer onions into a 9" x 9" casserole dish, add uncooked rice to dish and mix well.
- Return to stove and add stock to sauce pan and gradually heat stock and add cayenne, salt, pepper and bring to boil then transfer to casserole and pour it over rice.
- Cover casserole tightly with tin foil and bake for 35 min.
- Once done, remove from oven, remove foil and let the rice sit for 10 minutes before serving.
Hey there Honey's and New-Bees!
For years rice was a bland filler I’d have on the side with soya sauce. So when I started learning how to cook I just stopped making rice altogether since I found it so boring. I also figured that since I knew how to boil rice there wasn’t anything else to learn…OH MY was I wrong!
One night, while hungry, I went on a Pinterest-binge and came across “rice pilaf”. It looked simple and low-maintenance, so I figured “hey why not, let’s give it a chance”. OMG, when that rice came out of the oven (yes, I said oven) my opinions on rice were forever changed. The rice was fluffy, evenly cooked, aromatic and most importantly DELICIOUS (no soy sauce required lol)! From that moment I realized that rice doesn’t have to be plain and boring, and you can easily add a little zing and pop to it to make it a crowd pleaser 🙂
I’ve now learned to appreciate how awesome of a staple rice is, and how great of an addition it is to so many meals (it can be tailored to compliment any flavour palette).
So without further ado, let’s learn how to spice up your rice!
Step 1 – Prep, Chop and Fry
Start pre-heating your oven to 350ºF, finely chopping an onion and 2 celery ribs (optional), and start to warm up your chicken stock on the stove.
Preferably you want to use your own homemade chicken stock, but if you don’t have any on hand or your not quite ready to make your own stock, that’s totally ok (remember it’s all about gradually building your skills), you can use pre-made stock. But either way be sure to heat your stock (It will all make sense by Step 2).
Step 2 – Toast your Rice
Ok, so now that your prep work is all done and your stock is warming it’s time to start cooking. So grab a skillet or frying pan (or Dutch oven if you have one) and pre-heat your pan – meaning turn the burner to low-med, let your pan warm up (warm, not HOT) without anything in it for about 2 minutes. This is a crucial step to follow whenever you fry anything; pre-heating your pan allows the metals to start expanding which helps prevent sticking and also help sensure that your food is cooked evenly.
Once your pan is heated, add a good amount of good quality olive oil or unsalted butter (whichever you prefer, or both).Allow your fat to warm up then add your onions and celery with a pinch of salt, and fry until your onions are translucent. Season with a small dash of cayenne pepper.
Now, at this point you want to add your uncooked rice to the frying pan to “toast” it. Toasting your rice brings out a nice nutty flavour, and helps prevent it from clumping so that it’s nice and fluffy. This is seriously one of the best tips I can pass onto you, and strongly encourage you NOT to skip this step! Toast your rice for about 2- 5 minutes, or until the rice goes from opaque to ‘frosted’.
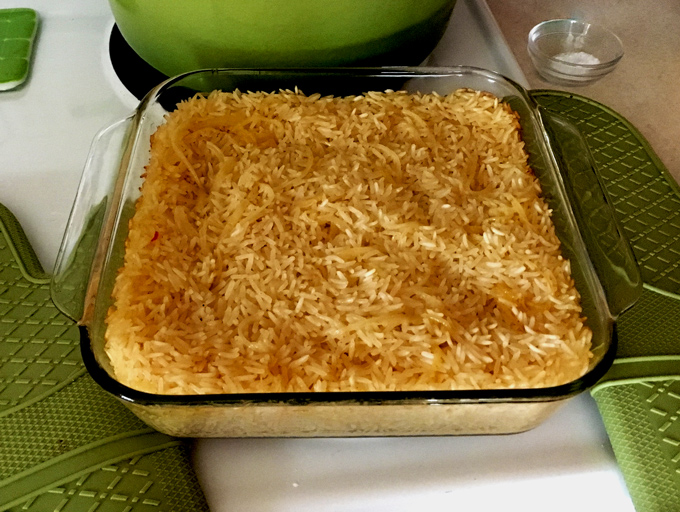
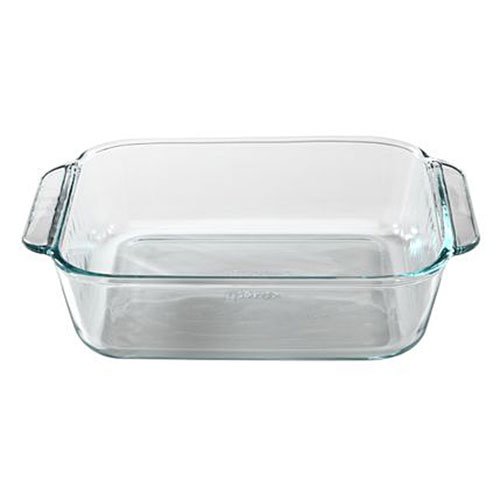
Remove from the stove, and transfer to a 9″ x 9″ casserole dish (no need to transfer if you’re using a dutch oven), add your stock, cover tighly with foil (or dutch oven lid) and transfer to the oven to bake for 35 minutes.
Step 3 – Bake your Rice
This step is pretty self explanatory, once your rice is in the oven leave it alone and let it cook for 35 minutes. That’s it!
Baking your rice is probably one of my favourite kitchen skills I’ve learned – not only does it free up your stove to prep the rest of your dinner, unlike stove-top rice which cooks unevenly if you don’t tend to it frequently (since it cooks from the bottom), oven baked rice cooks evenly with little maintenance (and if you leave it in long it doesn’t quickly burn, or even overcook).
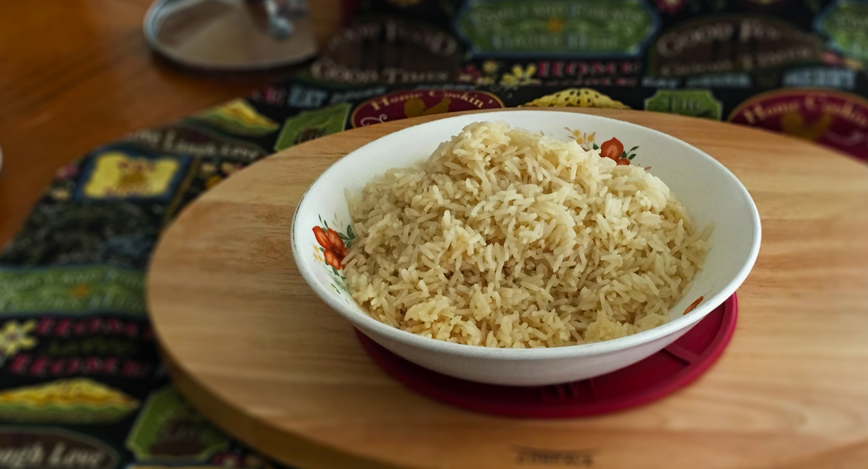
After your rice is out of the oven, let it sit for a few minutes, then remove the foil, and with a fork, fluff up your rice and serve 🙂 ENJOY!
Items Featured in this Post:


Ingredients
Method
- Pre-Heat oven in 350° F.
- Melt butter and oil in large pan on medium heat.
- Add onions and cook until browned (7-8) minutes, then transfer onions into a 9" x 9" casserole dish, add uncooked rice to dish and mix well.
- Return to stove and add stock to sauce pan and gradually heat stock and add cayenne, salt, pepper and bring to boil then transfer to casserole and pour it over rice.
- Cover casserole tightly with tin foil and bake for 35 min.
- Once done, remove from oven, remove foil and let the rice sit for 10 minutes before serving.
If you liked this you'll love:
-
 Homemade Mexican Fried Rice
 This Mexican fried rice recipe is easy and quick to make, perfect for any weekday meal!
 -
 Homemade Dutch Oven Chicken & Rice
A warm and comforting one pot meal that's perfect any day of the week.
Homemade Dutch Oven Chicken & Rice
A warm and comforting one pot meal that's perfect any day of the week. -
 Homemade Curried Kabocha Squash
Something a little healthier after the holidays!
Homemade Curried Kabocha Squash
Something a little healthier after the holidays! -
 Homemade Thai Basil Beef with Eggplant
A simple homemade Thai dish, that's delicious and can be whipped up in 20 minutes.
Homemade Thai Basil Beef with Eggplant
A simple homemade Thai dish, that's delicious and can be whipped up in 20 minutes.
Never had rice pilaf before, big upgrade from what I usually make.
Didn’t have to watch the stove to make sure my rice didn’t burn to the pot and very flavourful.
Looks easy and more interesting than boiled rice
Can’t wait to try it out